Default GUI template customization
We provide features that allow you to customize our basic GUI template for your specific case. More information about using our GUI template can be found on this page.
Options
Support for Pretrained and Custom models
We support two ways to download neural network weights: external URLs (Pretrained) and internal paths from Team Files (Custom).
If you get your models from your Training App, the artifacts will be uploaded to Team Files, and your Serving App can use the same file structure and be compatible with the Training App. Your app must support Custom models for this case.
If your model weights and configs are saved outside of Supervisely, you can use Pretrained models to provide detailed info in the GUI about each model.
By default, both modes are active and shown in the GUI as two tabs. If you don't want to use Pretrained models, don't implement the get_models() method in your Model class. If you don't want to use Custom models, override the support_custom_models() method to return False as shown below:
Support for link to Files or Folders in Team File
For Custom Models, you can set the link type. The default value is file. If you want to use a link to a folder in Team Files and download the directory to use in your Serving App, override the get_custom_model_link_type() method to return the folder value as shown below:
Custom UI content in Pretrained Models and Custom Models tabs
The default GUI template also supports insertion of any Supervisely Widgets to Pretrained models and Custom models tabs. The custom widgets block is placed at the bottom of the tab.
You can use this, for example, to provide more info or media content about your models in the Serving App.
If you want to add some additional info to the Pretrained models tab, you can override the add_content_to_pretrained_tab() method:
If you want to add some additional info to Custom models tab, you can override the add_content_to_custom_tab() method:
You can use existing GUI content in your custom insertions because of the gui parameter provided here. For example, you can subscribe to changing selection in the models table to change something in your custom widgets block.
As an example, you can see file main.py in repository of Serve ViTPose app.
Nested model lists
If you have a case where you have some pretrained model architectures, and each architecture contains some of the pretrained weights (for example, trained on different datasets or with different parameters), we support Nested models.
In this case, a Select field will be added to choose the architecture, and the model table will contain checkpoints of this architecture.
You can change theget_models() method to use Nested Models. The default format of the method is List[Dict[str, str]]. The required format for using Nested models is Dict[str, Dict[str, List[Dict[str, str]]]].
How it looks like in the example code:
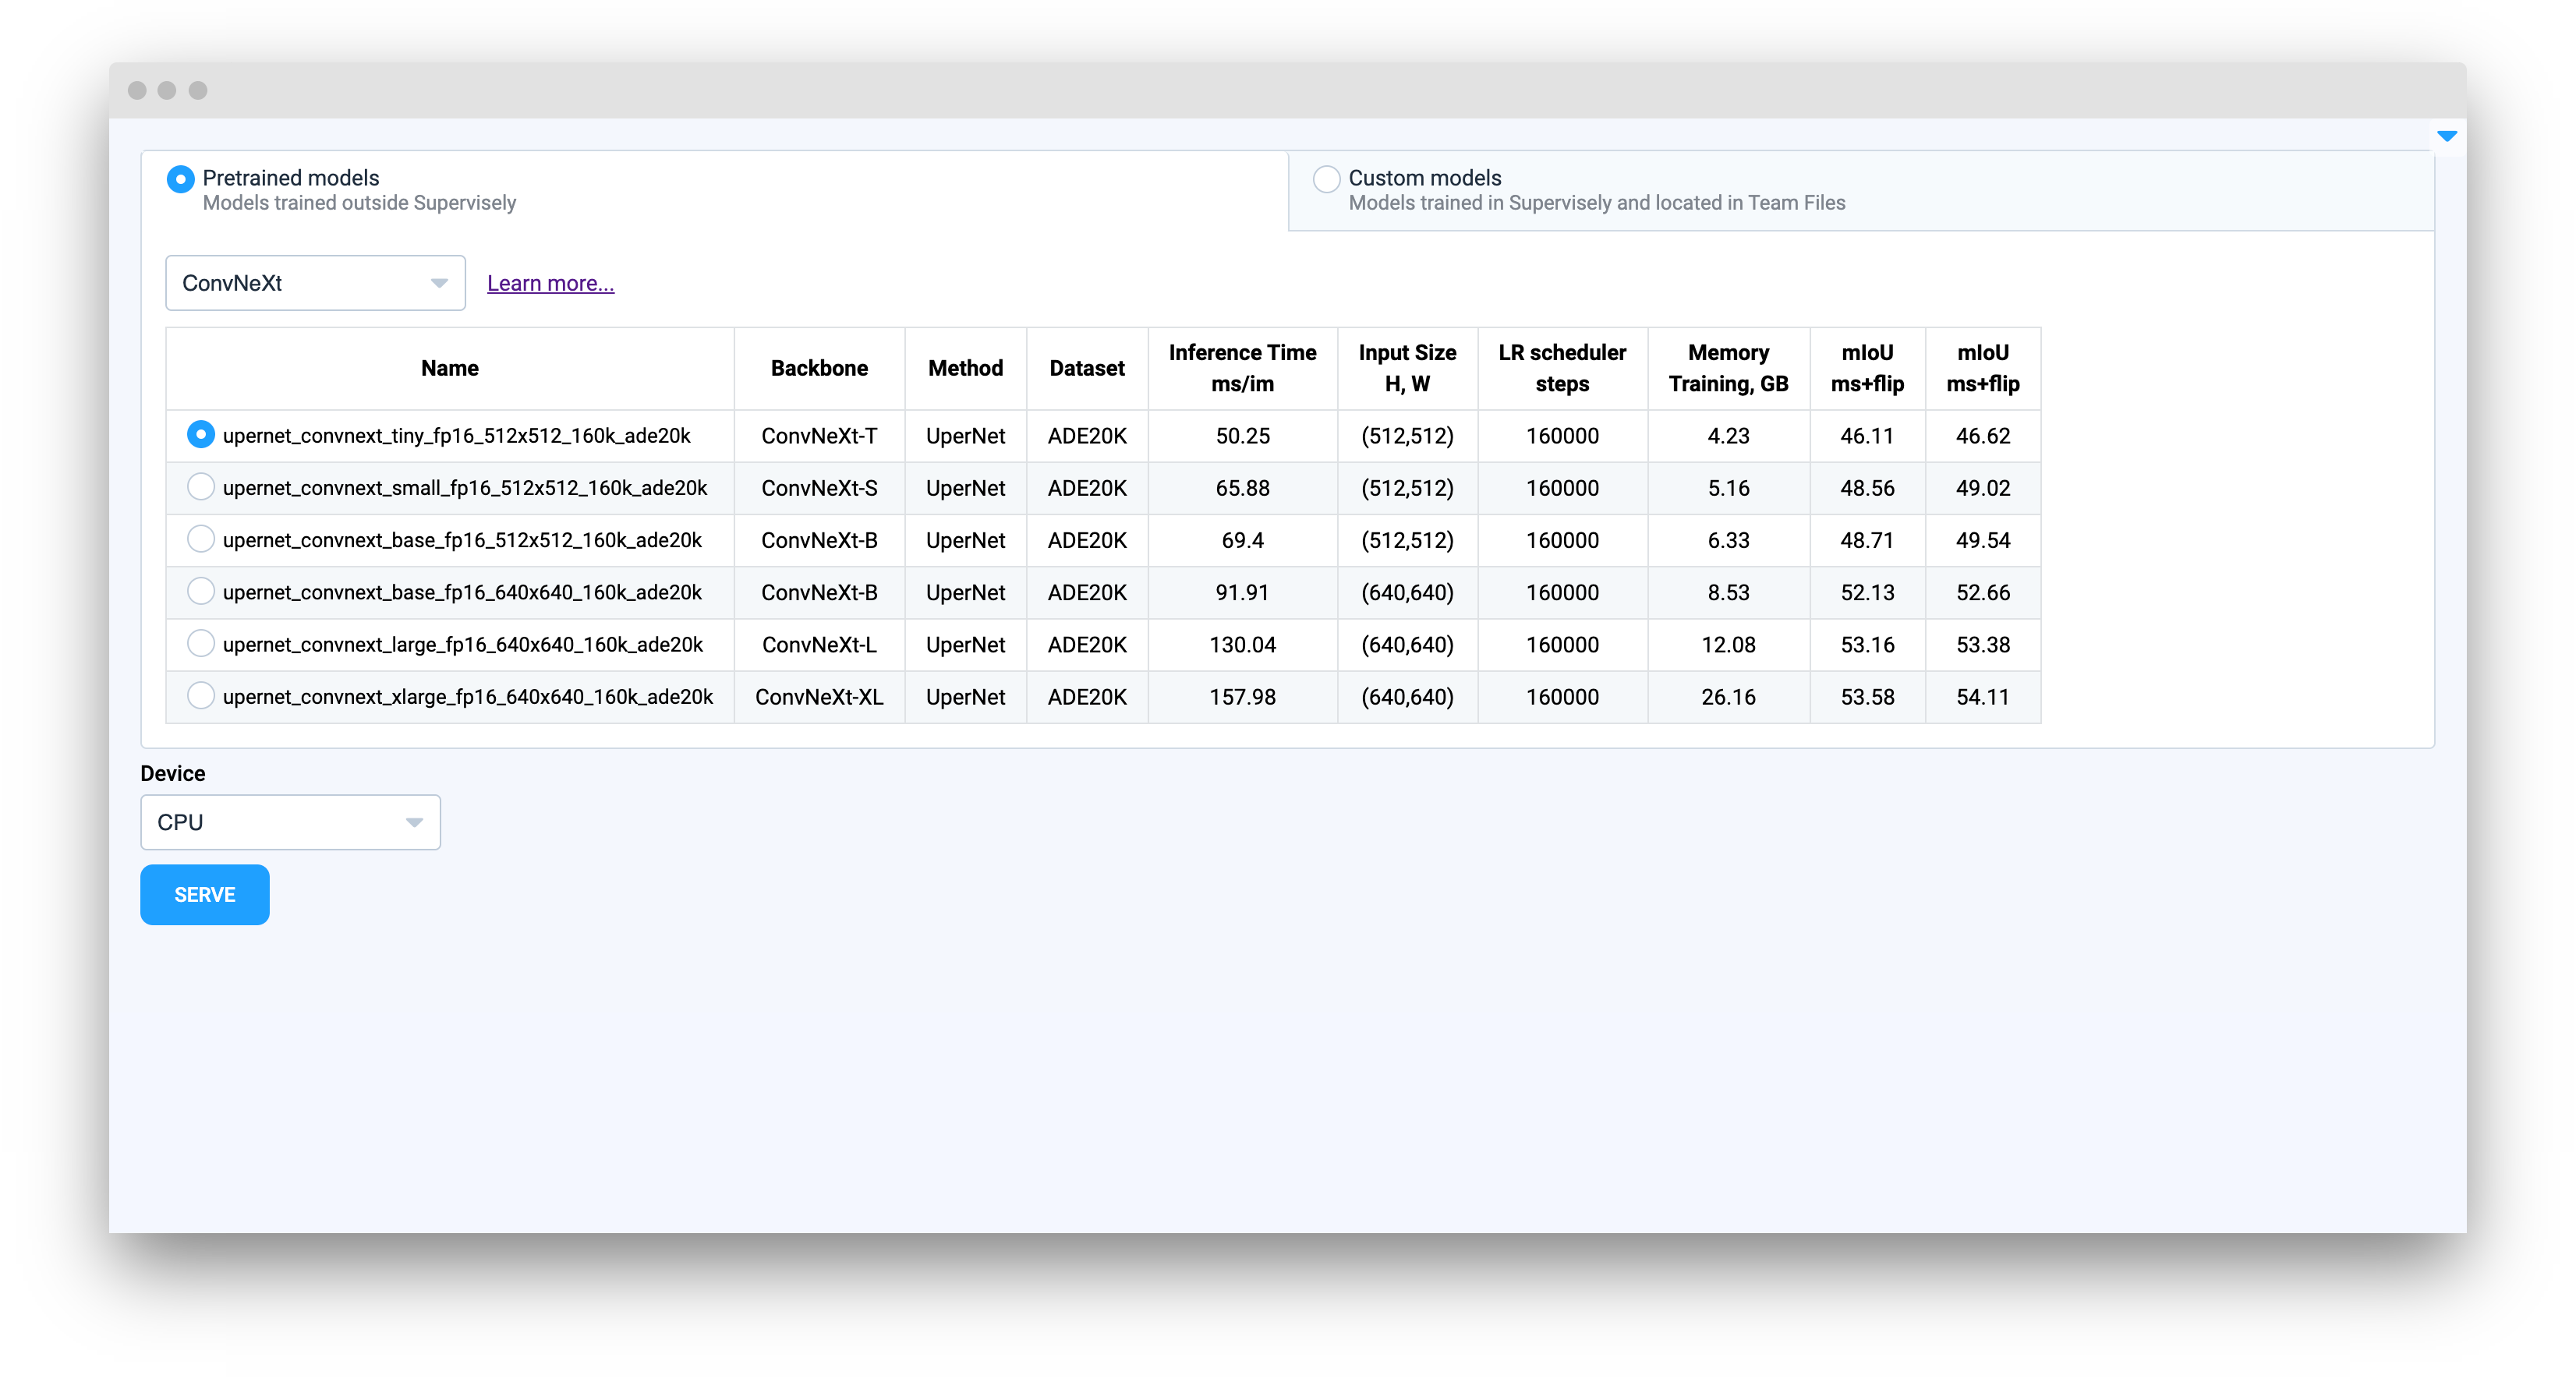
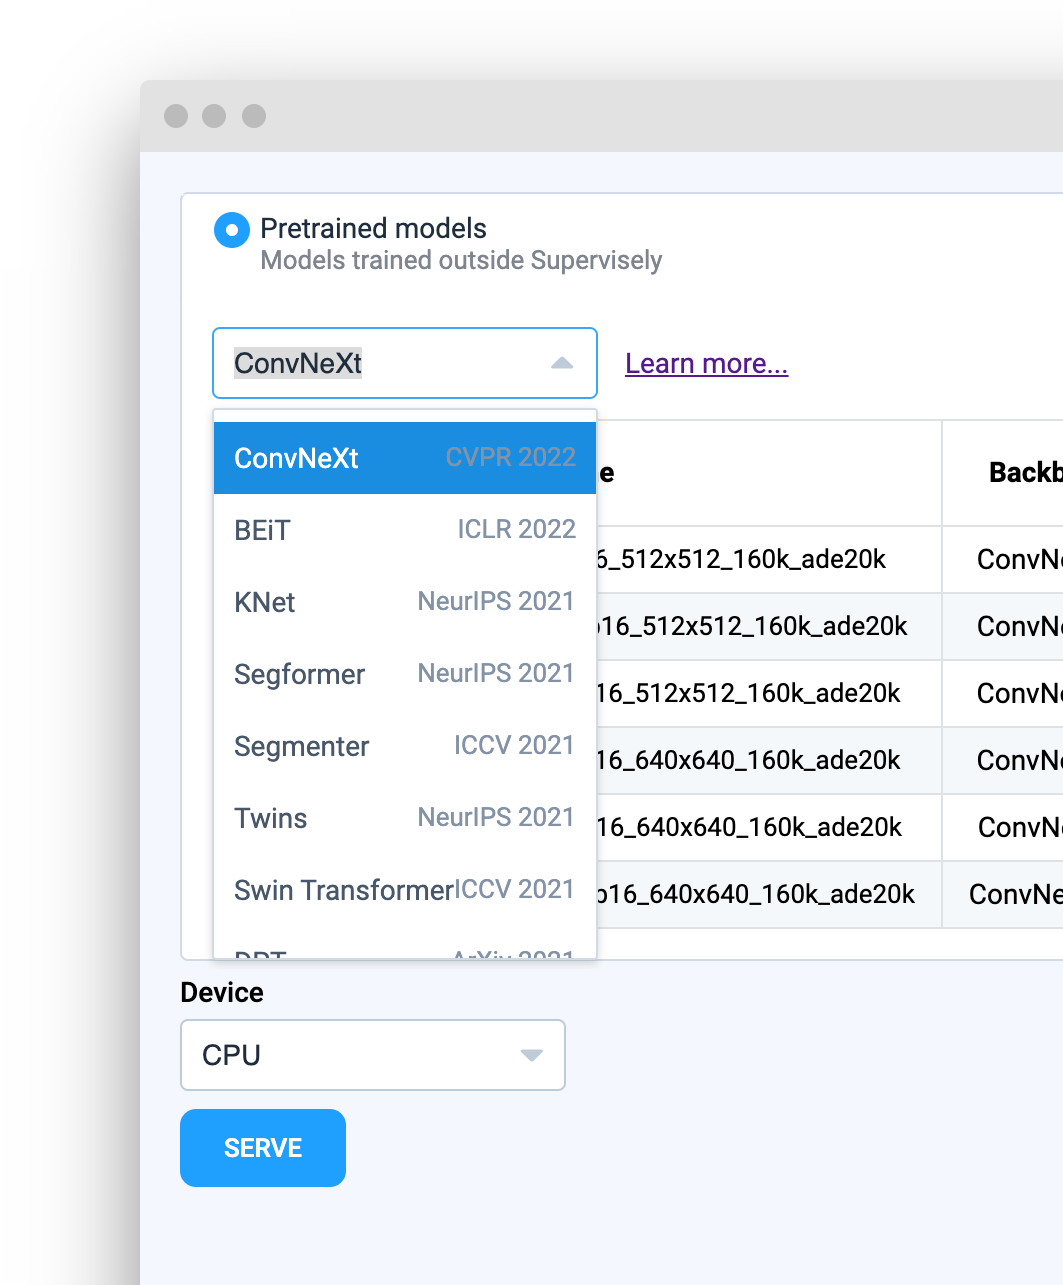
how it looks in the interface (using the application Serve MMSegmentation as an example):
checkpoints, paper_from and year are reserved names in our GUI Template. checkpoints stores list of models info to display in the table, paper_from and year are used to show this as right text in Select field with models:
GUI Template Methods
These methods can be used in your model logic, such as in the load_on_device() method, to retrieve information from the GUI provided by the user.
gui.get_checkpoint_info()
This method returns a dictionary of the selected checkpoint from the model table, only if Pretrained models are supported in your app.
gui.get_model_info()
This method is useful only if you use Nested Models. It returns a dictionary in the format: {selected_architecture_name: checkpoint_info} where selected_architecture_name is the name of the model from the Select field, and checkpoint_info is the result of the gui.get_checkpoint_info() method.
gui.get_device()
This method returns the name of the selected device to run the model, for example, cpu or cuda:0. The result of this method is automatically provided to the device parameter in the load_on_device(model_dir, device) method.
gui.get_model_source()
This method returns the type of tab that the user selected, either Pretrained models or Custom models.
gui.get_custom link()
If the model source is Custom models, this method returns the link to the file or folder from Team Files.
Example
For more details, you can refer to the file main.py in the Serve MMSegmentation app repository.
Last updated