How to use default GUI template
This tutorial demonstrates how to add a basic user interface to your integrated neural network using a default GUI template. As an example, we will consider a repository with an instance segmentation model and transform it to an app with GUI.
interface appearance
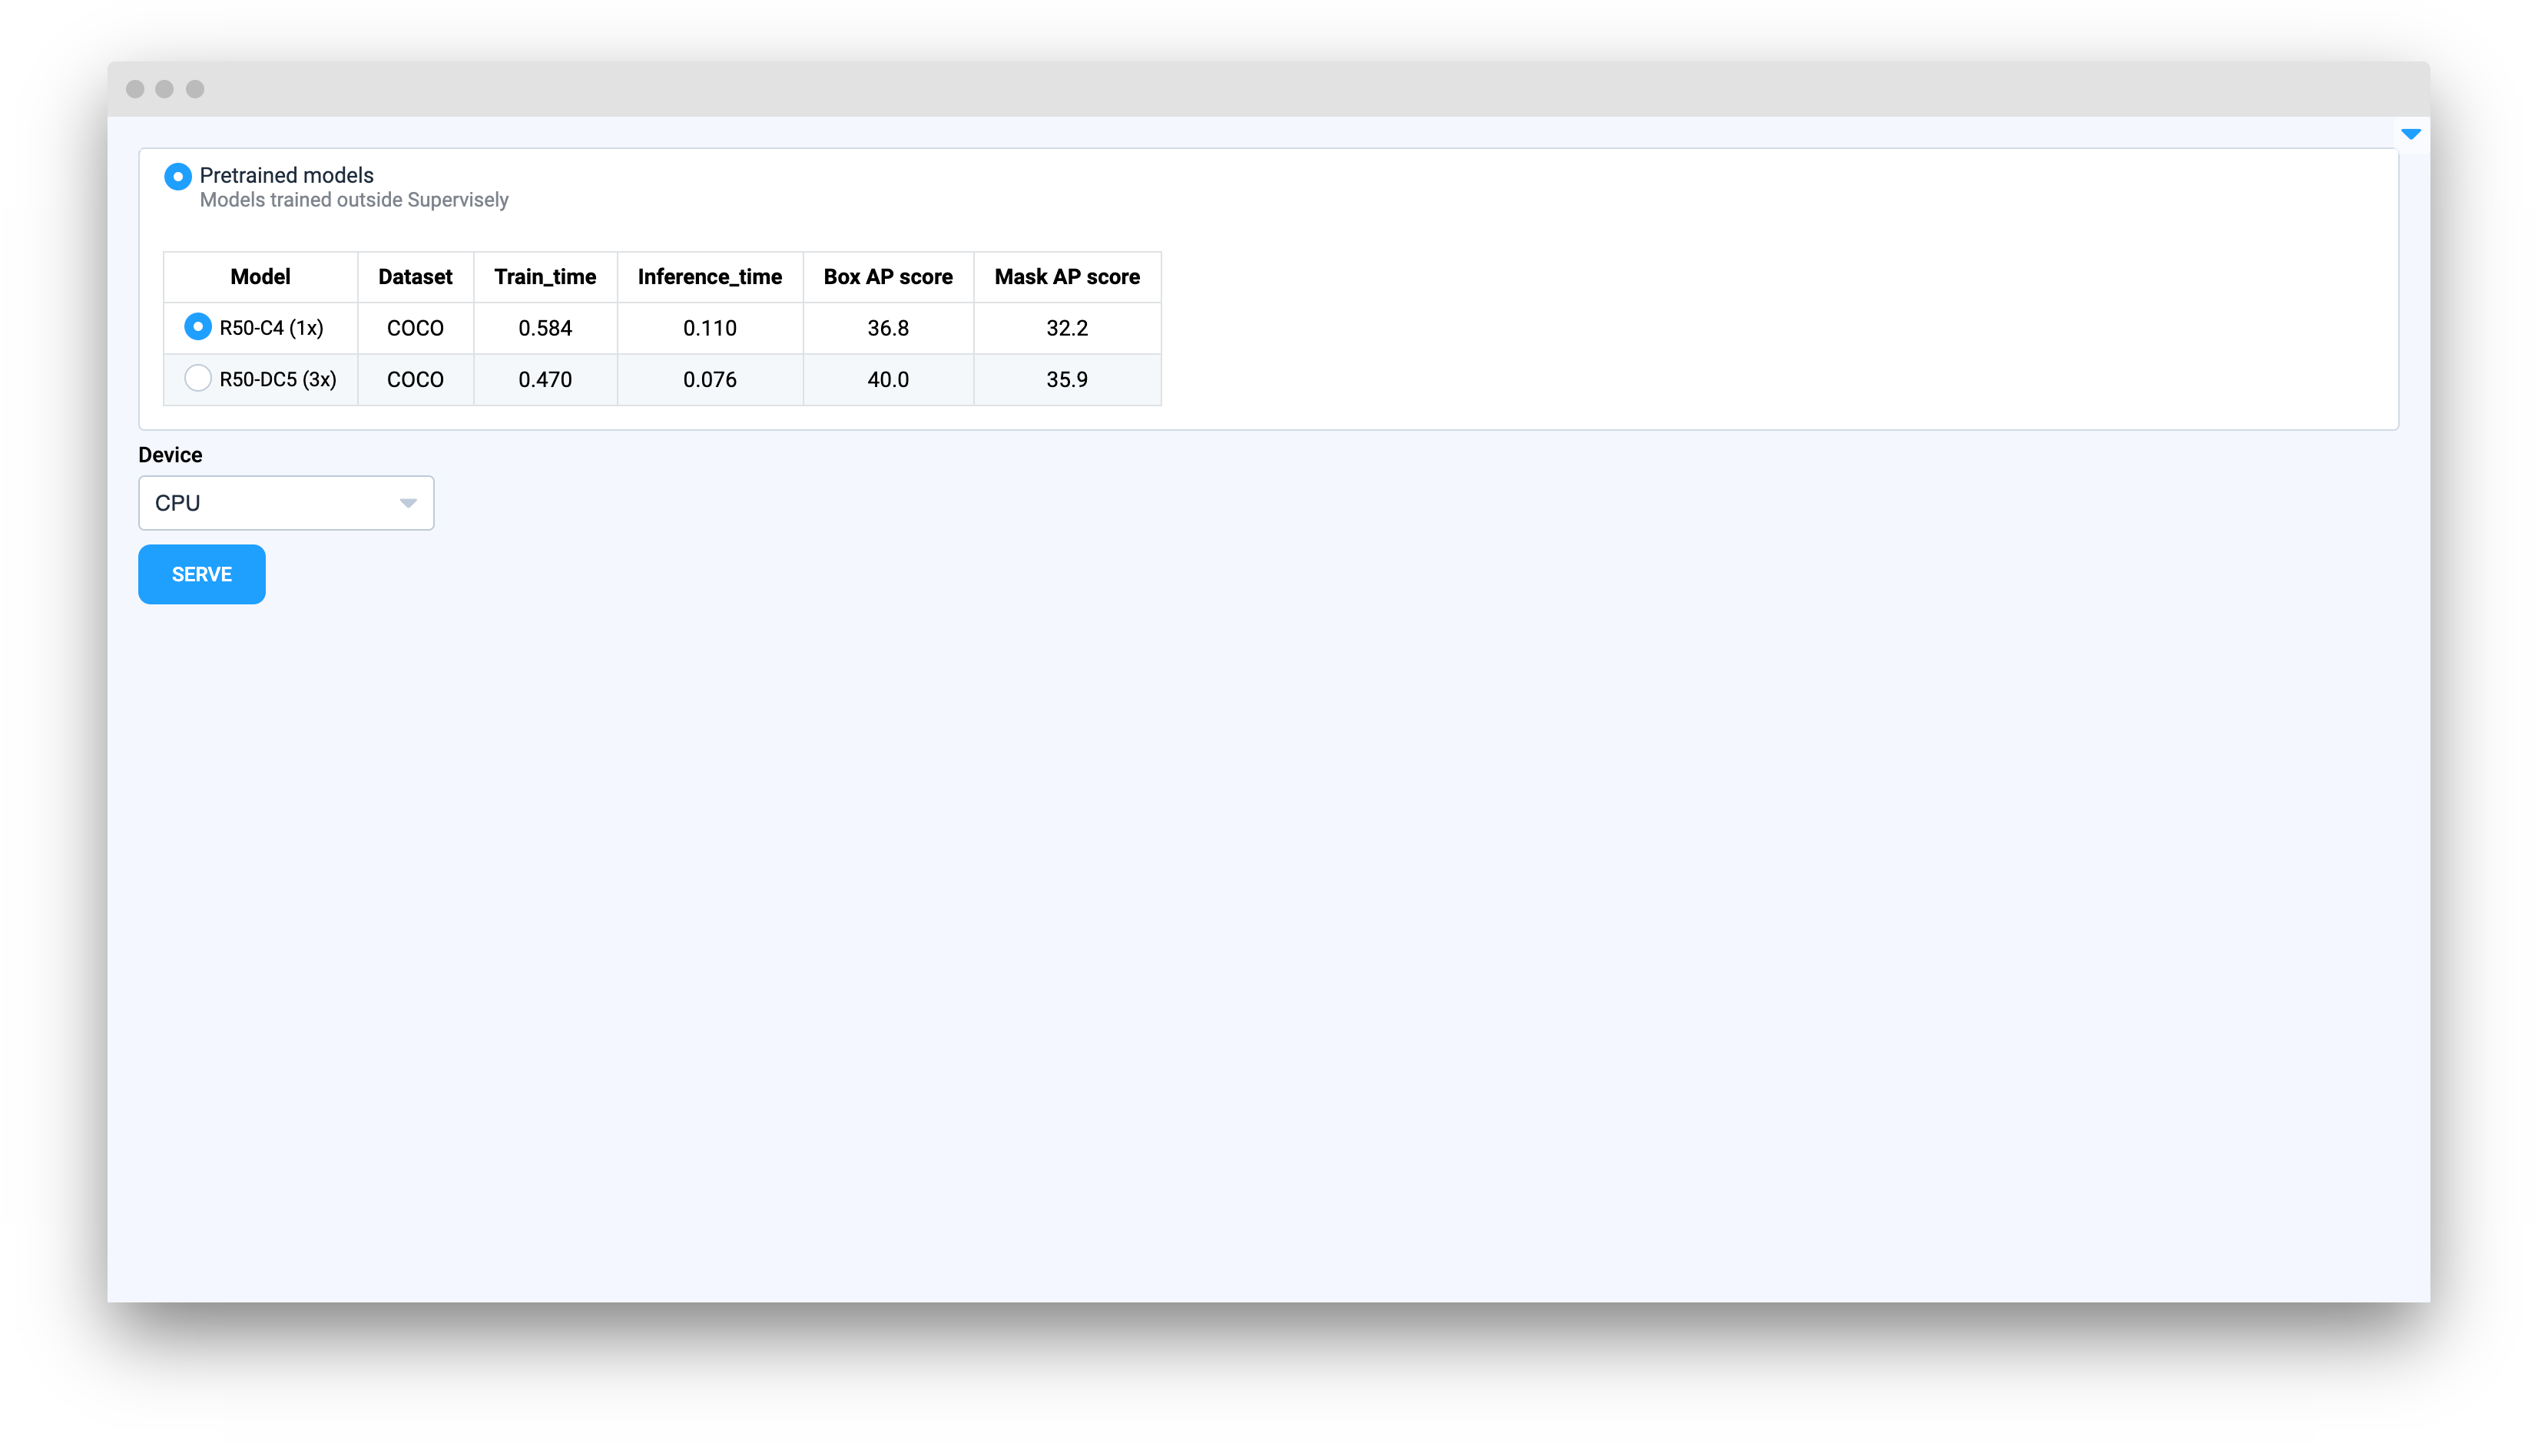
Firstly, let's take a look at how the interface appears:
Table with models info
Developers can provide any model information in a simple form and display it on this table.
Device selector
The template will automatically detect all available devices.
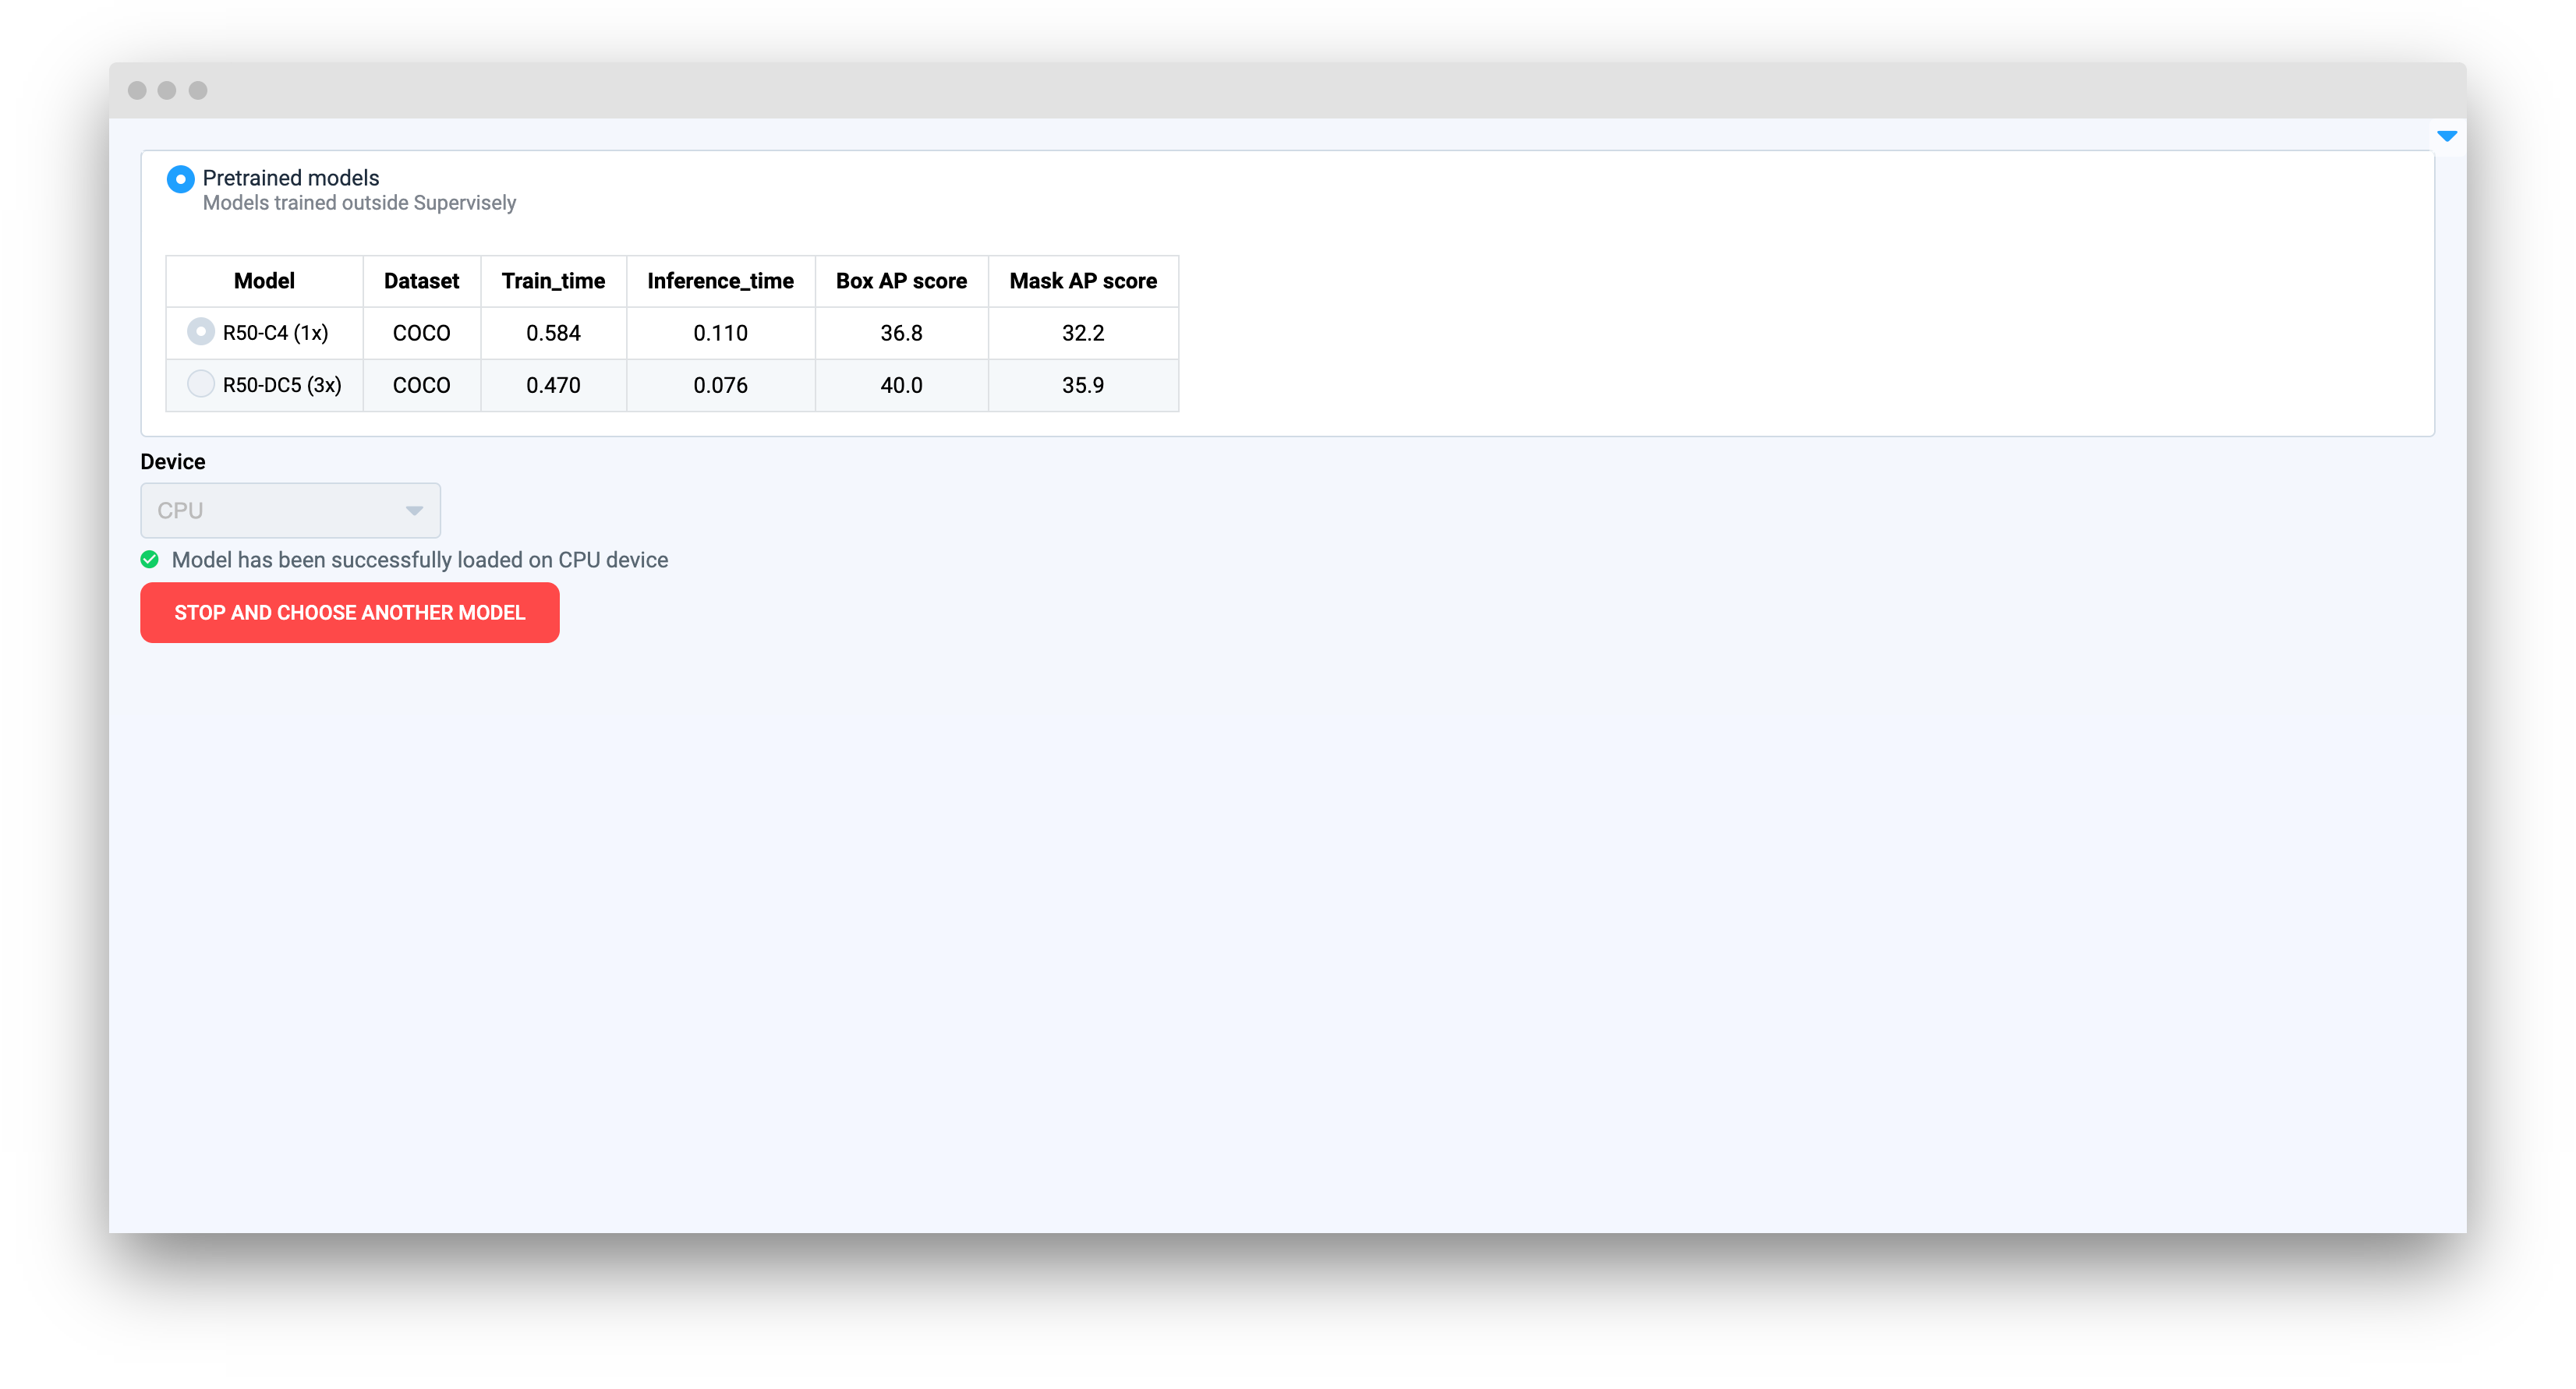
"SERVE" button
After clicking the button, the model weights downloading process will begin, and you will see a progress bar. After successful downloading, the SERVE button will disappear, and the STOP AND CHOOSE ANOTHER MODEL button will appear instead. You can change the served model without rebooting the session.
Tutorial
In this tutorial, we will show you how to add a user interface to your model app, and we will compare how it works with and without the GUI using the Integrate instance segmentation model with GUI repository and Integrate instance segmentation model without GUI repositories, respectively.
Firstly, clone this repository and launch it on your computer to ensure that the code works correctly.
Clone and launch
Step 1. Prepare ~/supervisely.env file with credentials. Learn more here.
Step 2. Clone repository with source code and create Virtual Environment.
Step 3. Open the repository directory in Visual Studio Code.
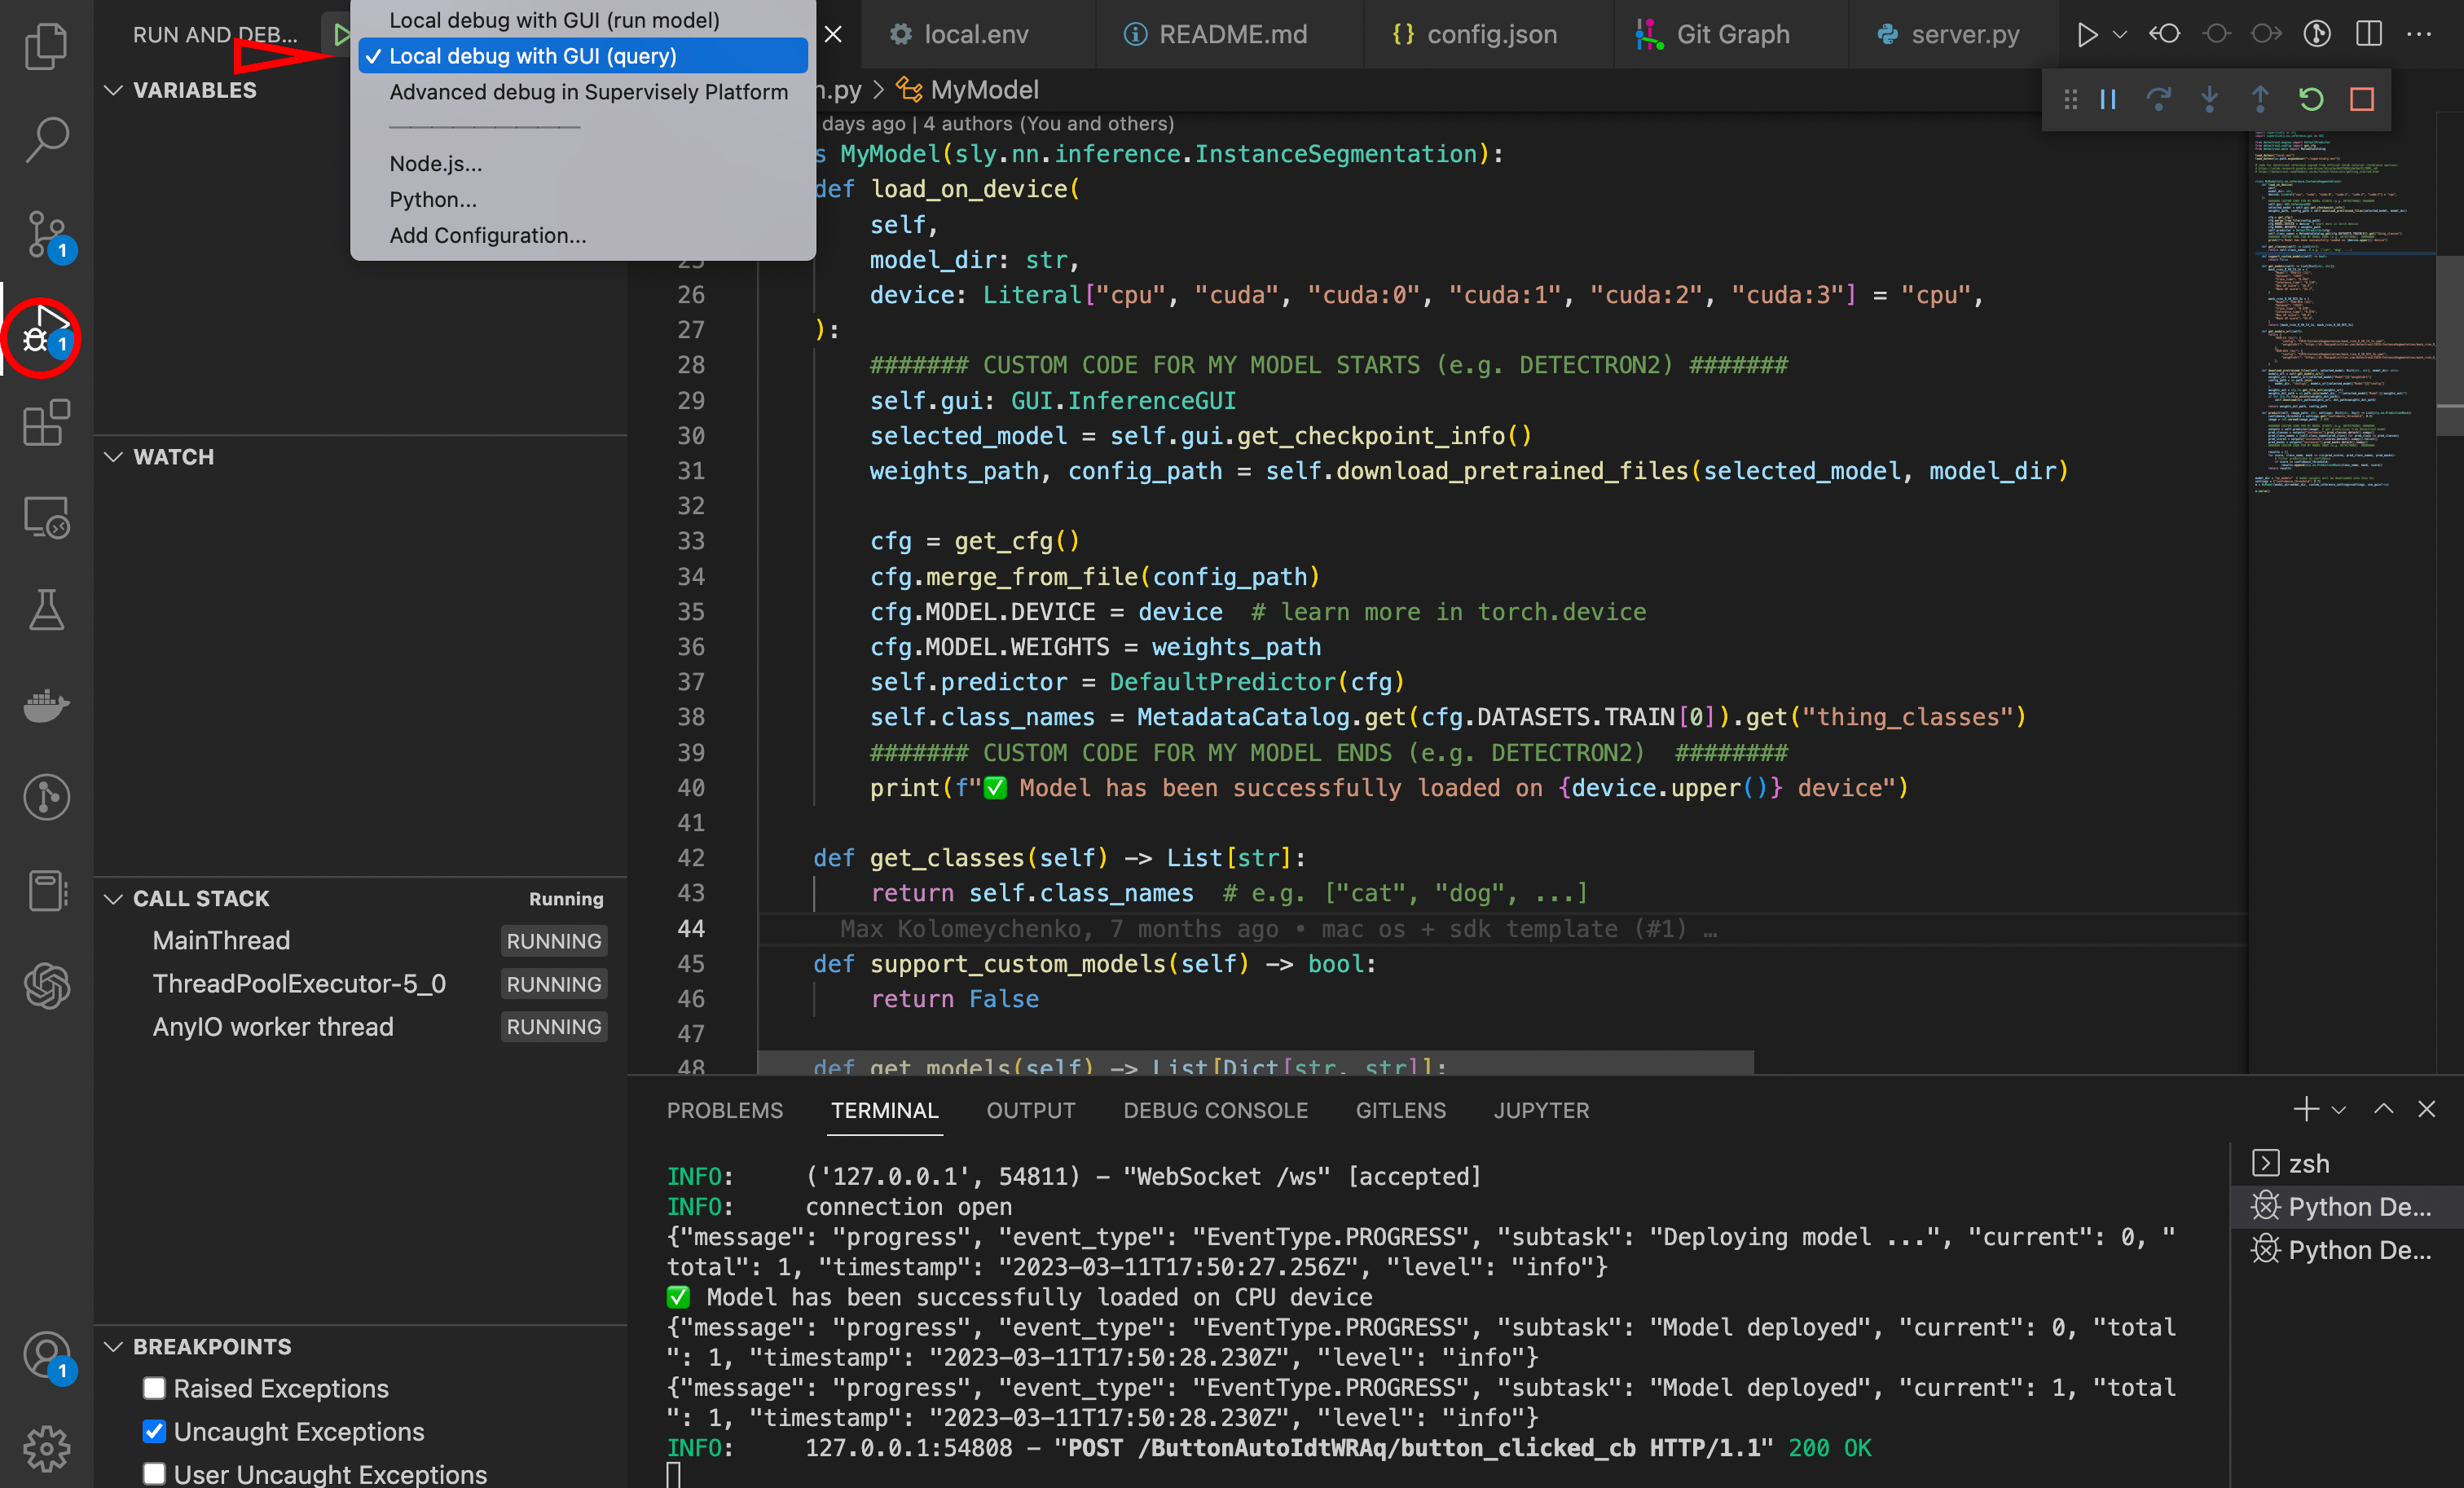
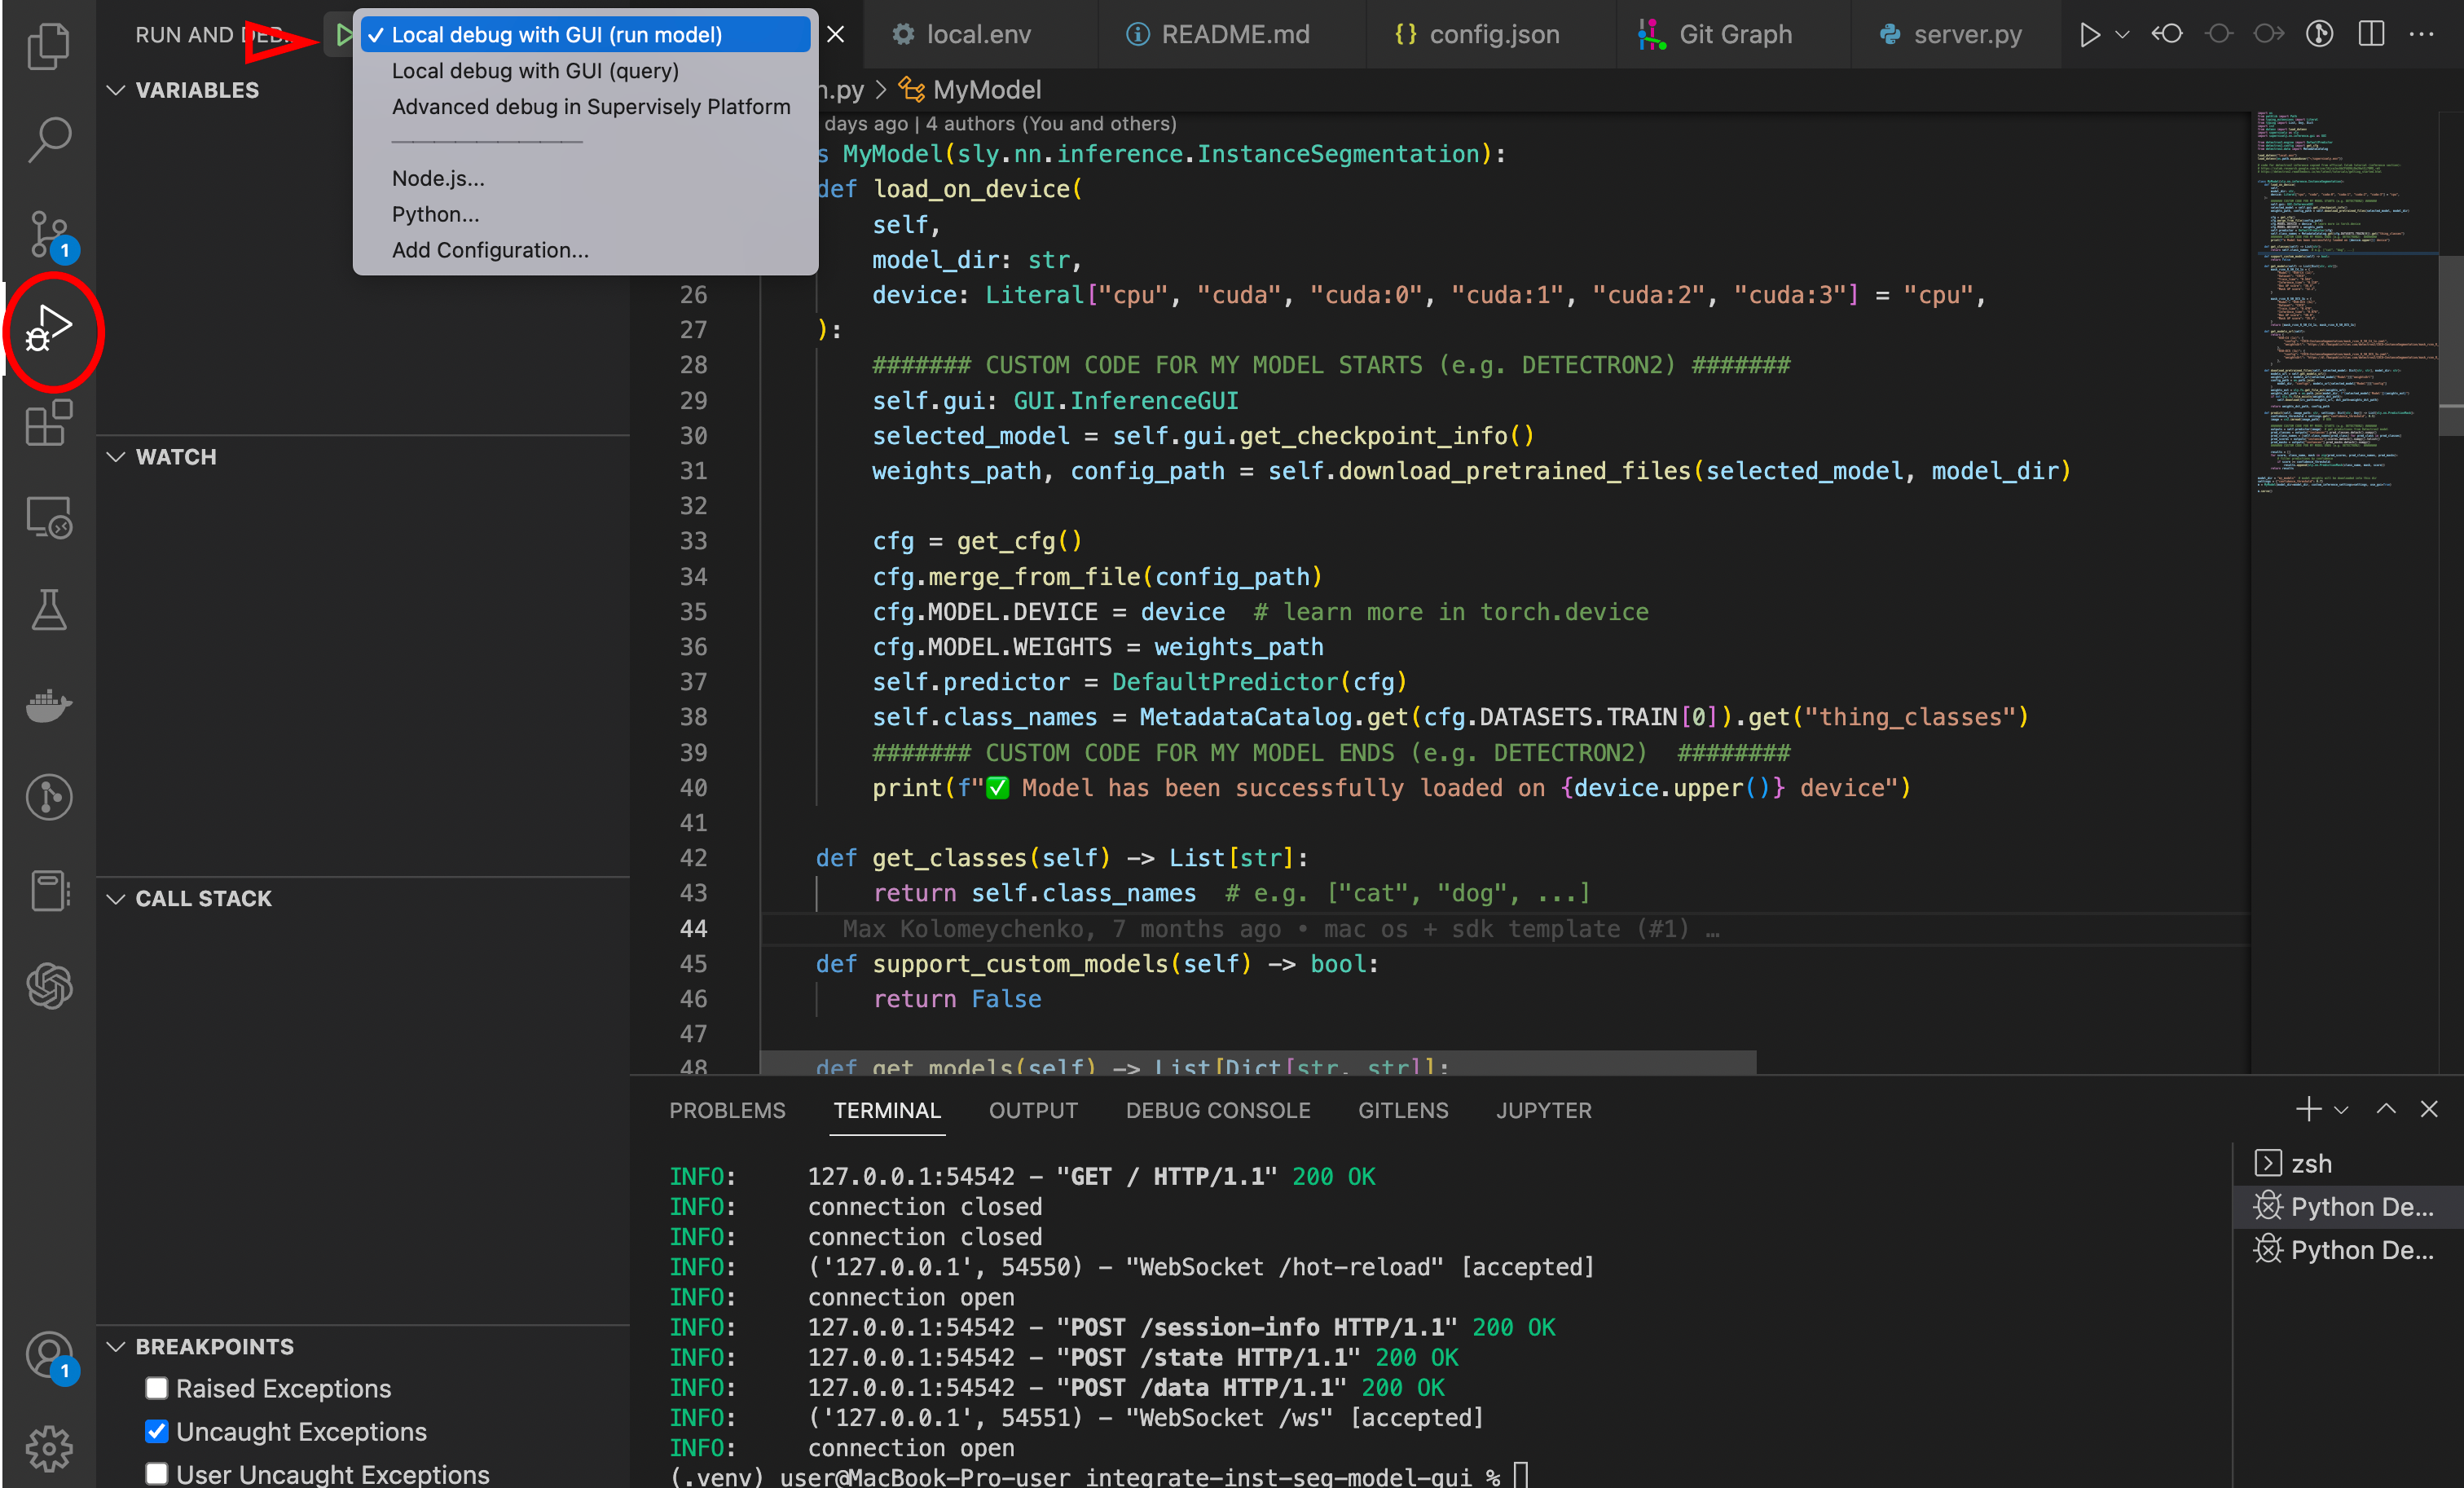
Step 4. Run the debug configuration Local debug with GUI (run model) in VSCode.
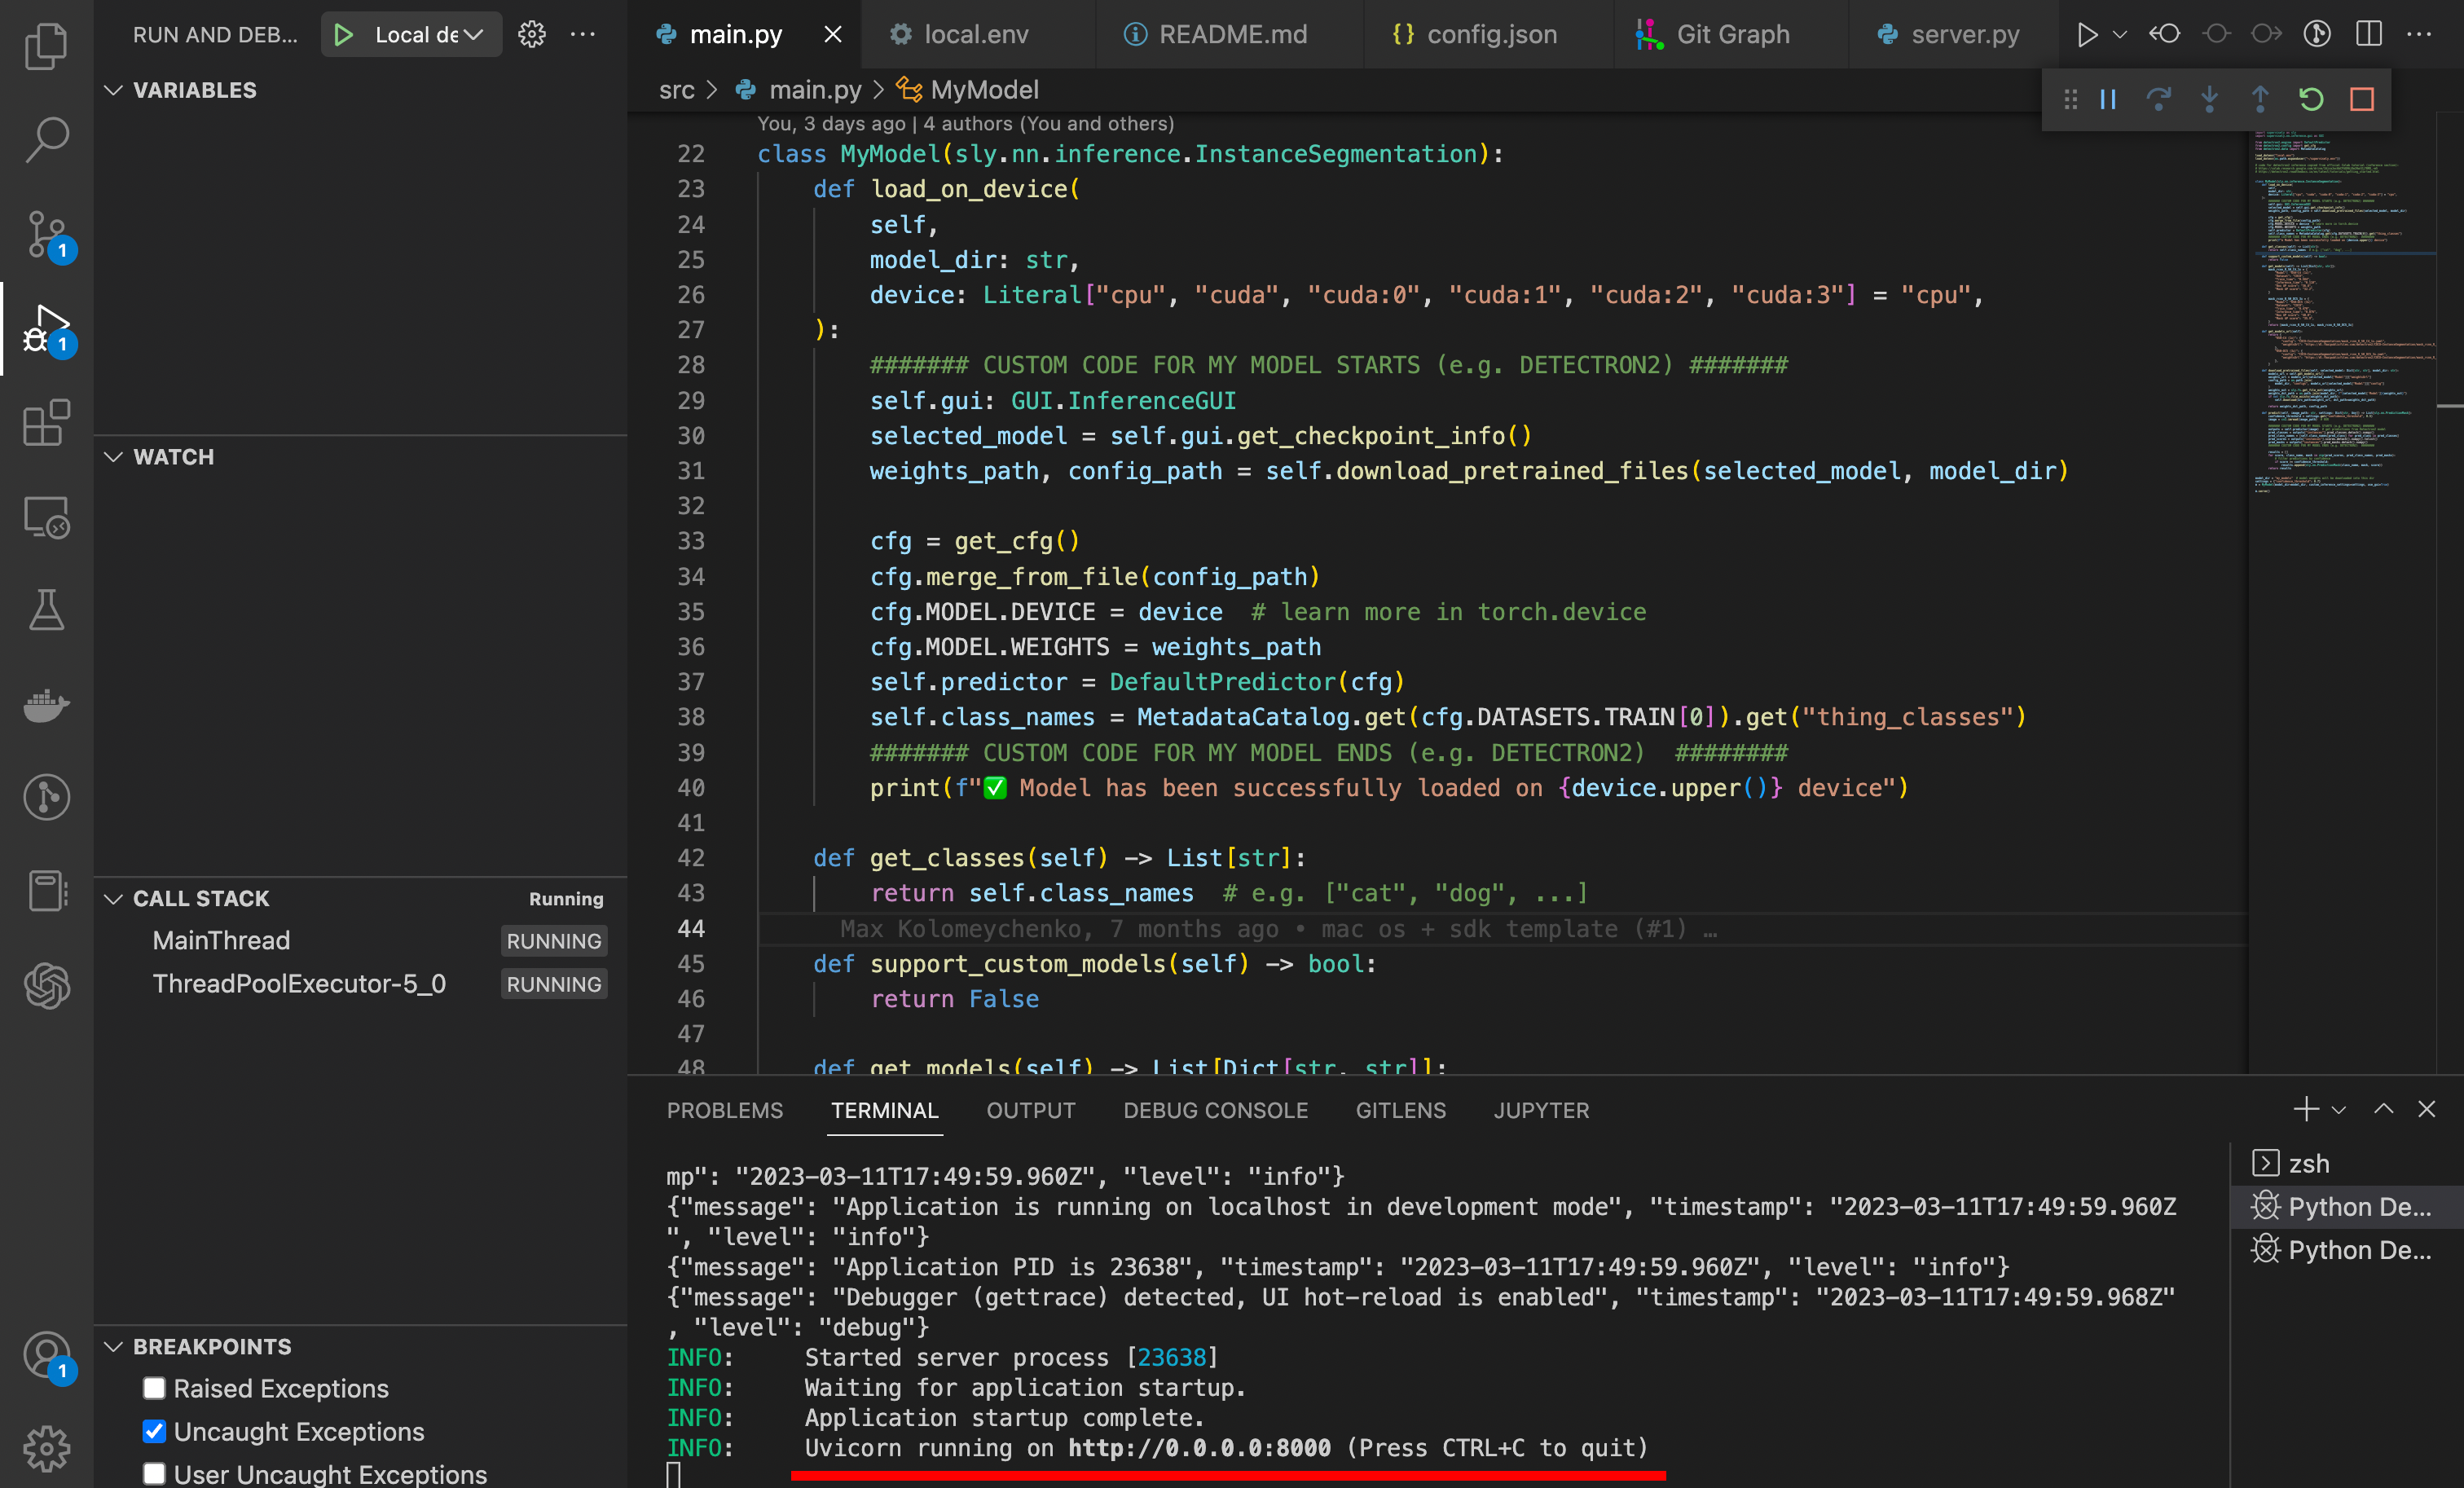
Step 5. Open http://0.0.0.0:8000 in your browser (or just click on appeared link in VSCode terminal).
Step 6. Choose and serve the model in the web browser on the selected device.
Step 7. Run the next debug configuration Local debug with GUI (query) in VSCode. For local run, you have to use one script for a model with GUI and another script to create a query with an image to run the inference.
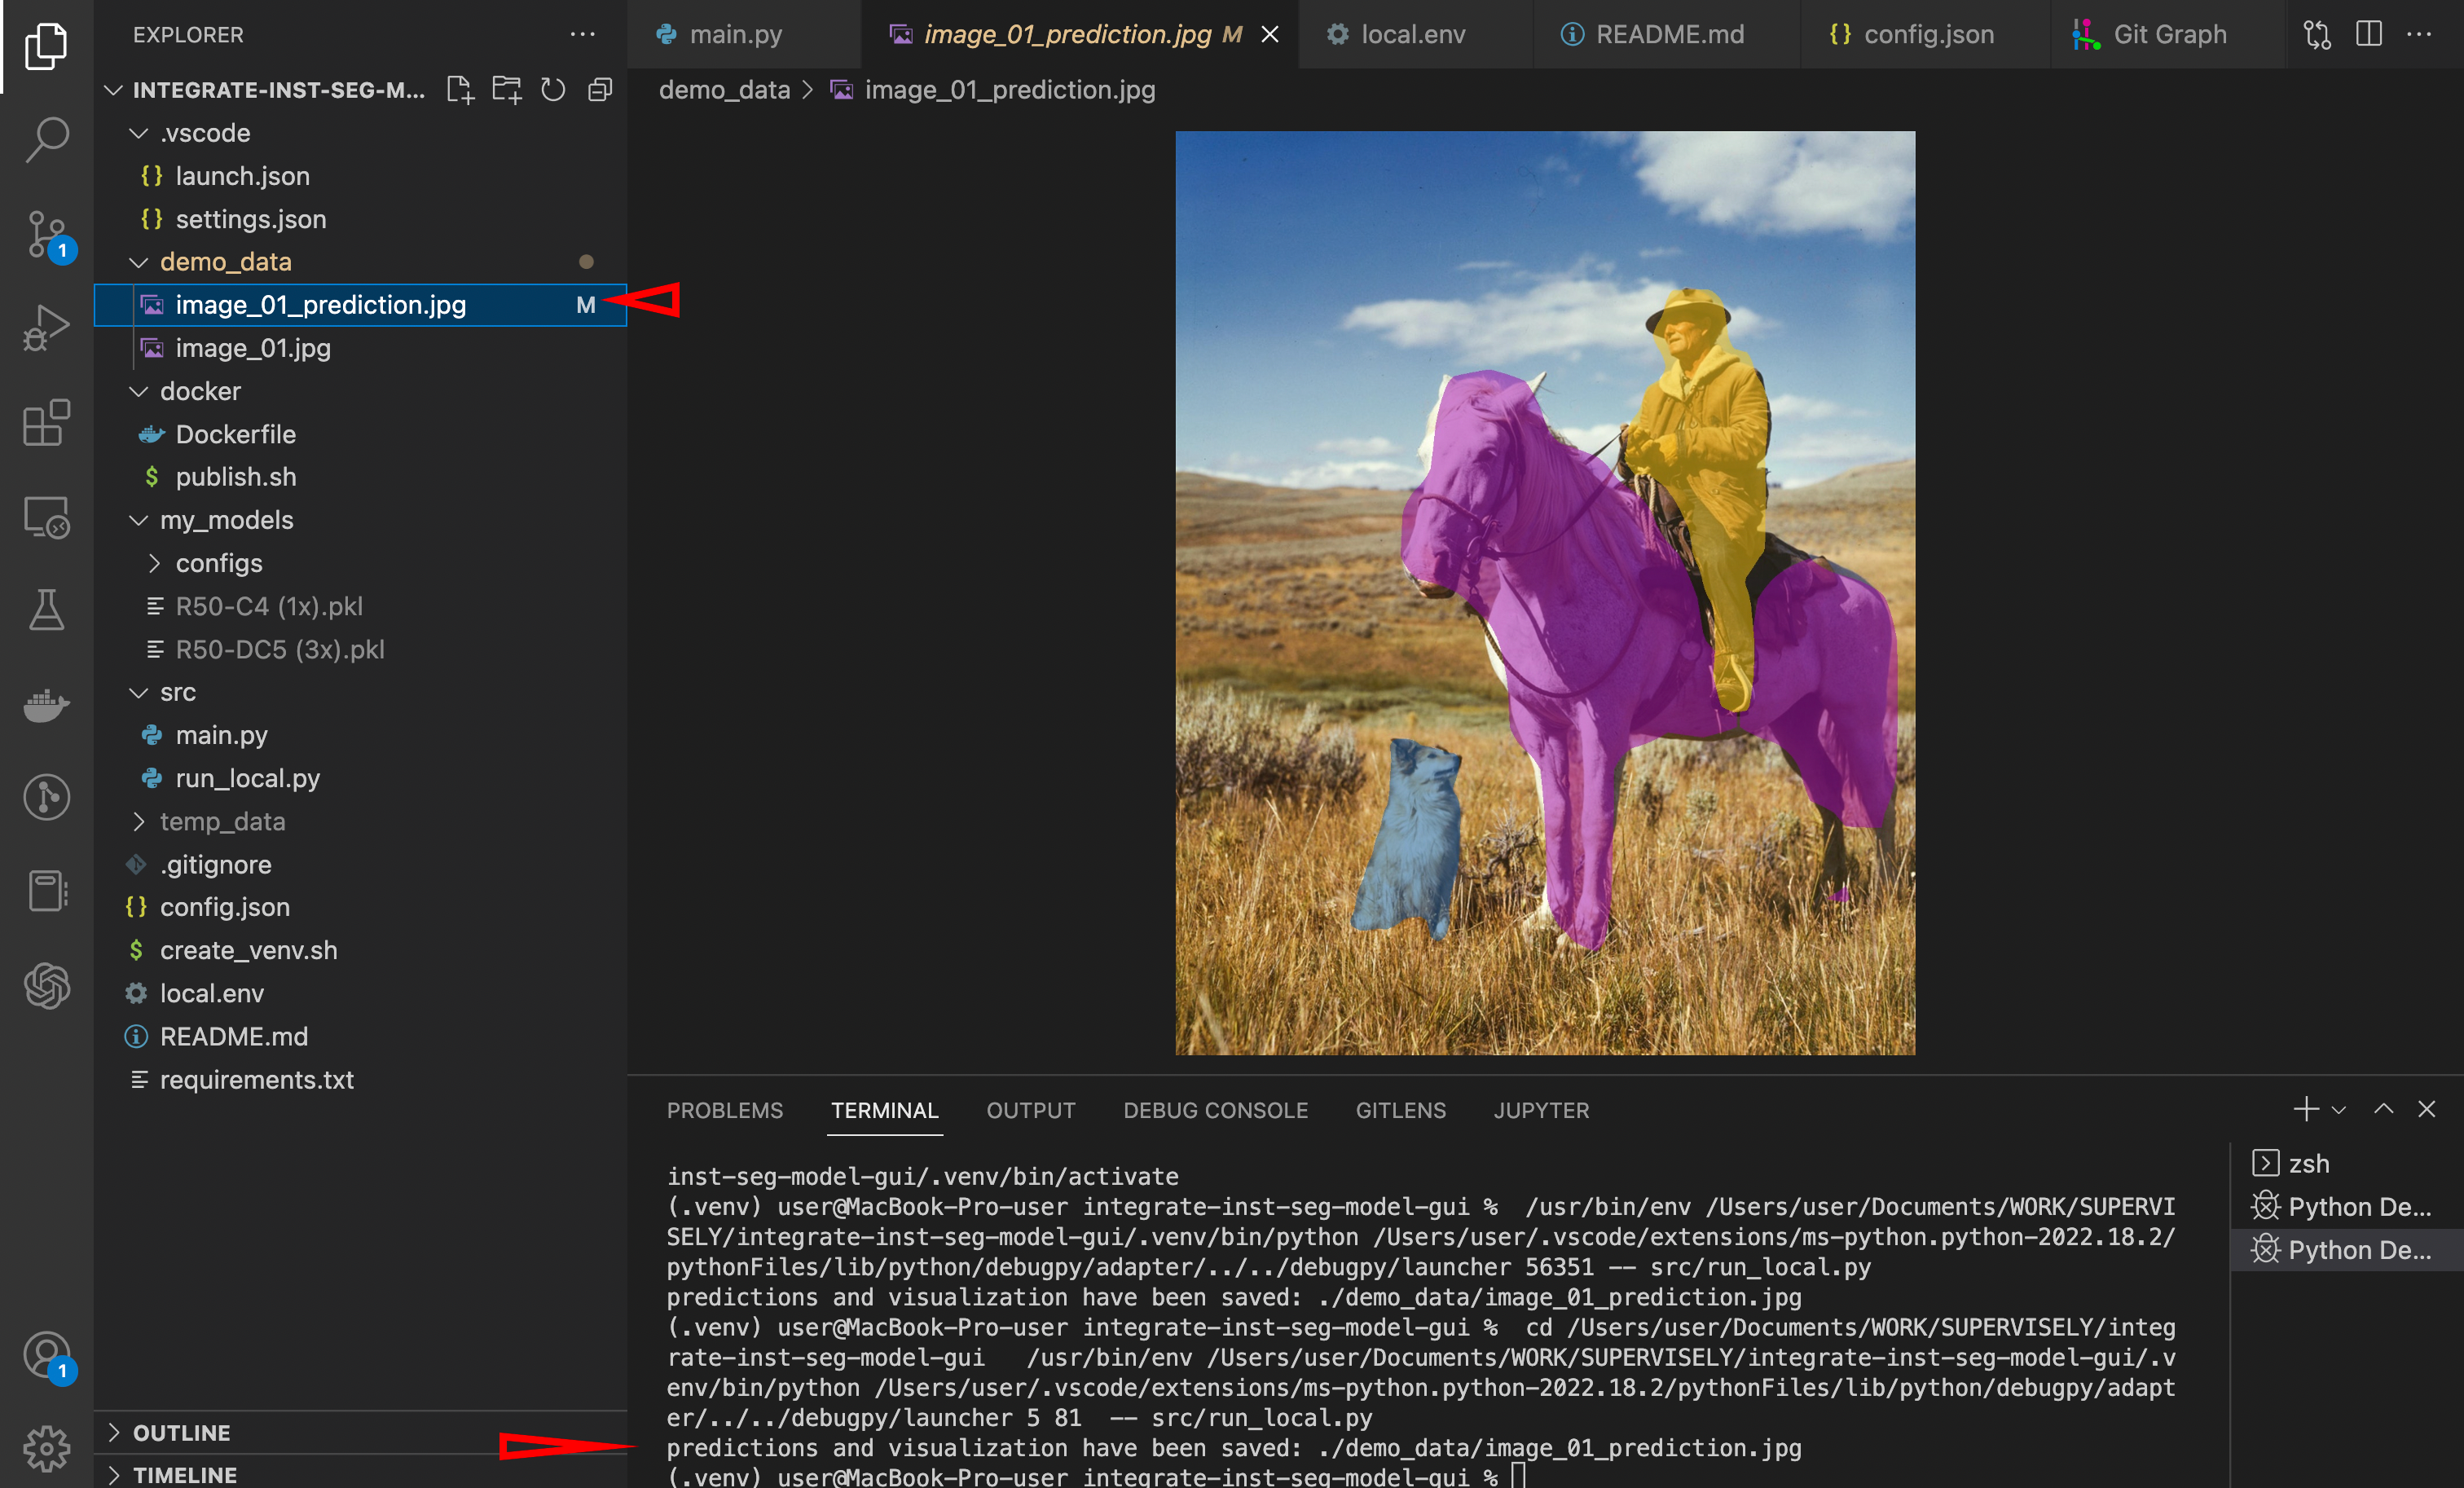
Step 8. Check result image ./demo_data/image_01_prediction.jpg to ensure that everything works correctly.
Implementation details
Apps with an integrated model without and within GUI have a few differences.
To support GUI, you have to provide flag
use_gui=Trueto constructor of your model.
If you want to place a list of pretrained weights to choose from on the app page, you have to implement the method
get_models()which returns list of models to show in the table.
Model method
load_on_device(model_dir, device)will be called automatically in model with GUI with providedmodel_diranddevicegot from user selection in interface. You don't have to call this method manually.
In the example, we have to download weights of selected model. We do this with next strings in load_on_device() methods:
selected_model gets dict of model data list from get_models() method, corresponding to selected model in GUI.
Method download_pretrained_files() implemented here to download selected model weights and get model config.
Release
To add your serving app with a GUI to Supervisely, follow the same steps as the tutorial without GUI The only difference is that you need to ensure that the headless parameter in your config.json file is set to false or removed.
Last updated